

Broken or damaged videos can be a source of frustration, especially when they contain precious memories or important moments. However, with the right tools and techniques, it is possible to repair damaged videos yourself. The availability of so many different software and tools makes it easier to restore your videos to their former glory. In this article, we will discuss some of the best DIY video repair techniques and tips to help you get your videos back in working order.
In general, repairing damaged videos can be a challenging task, but it is definitely possible with the right tools and techniques. Whether you choose to use video repair software, a video conversion tool, or professional help, there are many options available, you just need to find the one that best suits your needs and preferences. One of the most popular options that people tend to choose is Stellar Repair for Video, so you can try it as well. It is good to remember to regularly back up your videos and take care of your storage devices to help prevent future damage. With the tips we are going to mention, you can ensure that your videos will be preserved for years to come, and you can enjoy the memories captured in them for future generations.
Check the File Format and Codec
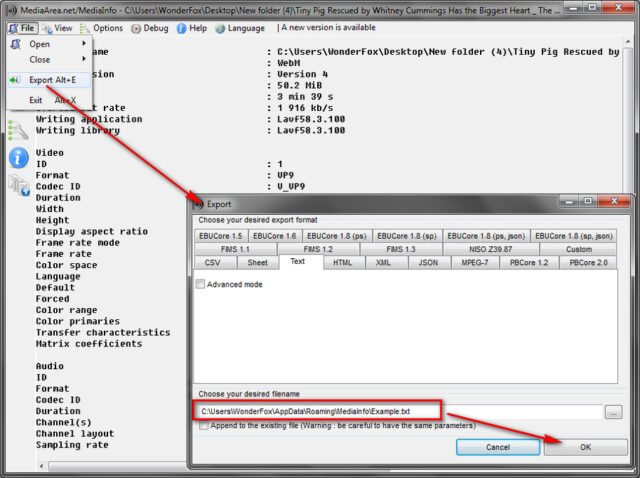
Before attempting any repairs, it’s important to check the file format and codec of the damaged video. Different codecs and file formats have different compatibility with video repair software. Some video repair software may only support specific codecs and file formats. It’s important to check this compatibility to ensure that you choose a video repair tool that can handle your damaged video. If the video file format and codec are unsupported, you may not be able to repair the video. If you’re not sure what the file format and codec are, you can use software that will help you identify them.
Try Video Repair Software
One of the most effective and popular ways to repair damaged videos is to use video repair software. Luckily, there are truly so many free and paid options available online that you can check. The process of using video repair software is relatively straightforward. Simply download and install the software, follow the instructions, and the software will repair the video for you. Some video repair software can repair damaged or corrupted headers, frames, and indexes in the video, which can help restore the video to its original state.
Use a Video Conversion Tool
Another effective technique for repairing damaged videos is to use a video conversion tool. These types of tools can help repair the video by converting it into a different file format. This can be particularly useful if the video codec is unsupported or if the video file format is corrupted. The conversion process can help rebuild the damaged parts of the video and restore it to a playable state.
Trim the Damaged Portion of the Video
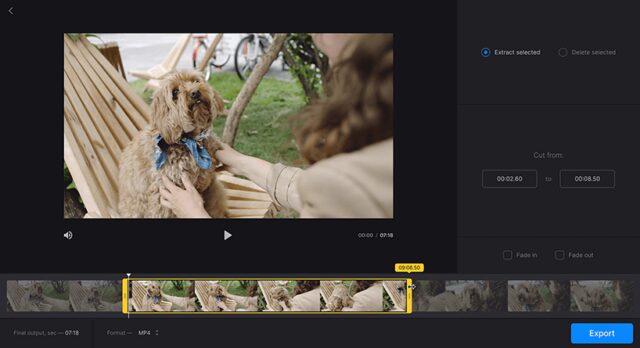
If the damage is confined to a specific portion of the video, you can try trimming that portion and saving the rest of the video. This can be done using most video editing software. Simply open the video in the software, find the damaged portion, and trim it out. You should know that this technique can be useful if the damage is limited to a small portion of the video and you do not mind losing that portion.
Repair the Audio
In some cases, the audio in a video may be damaged, even if the video itself is fine. In this case, you can try repairing the audio using audio repair software. The process of repairing audio is similar to repairing video. Simply open the audio file in the software, follow the instructions, and the software will repair the audio for you. This technique can be useful if the audio is the only problem with the video and you want to keep the video intact.
Try a Different Player
Sometimes, the video player itself may be the problem. If you are having trouble viewing the video, try using a different player. The video may play fine in the new player, and you can then save it in a different format. This technique can be useful if the video player is causing the problem and not the video itself.
Check for Physical Damage
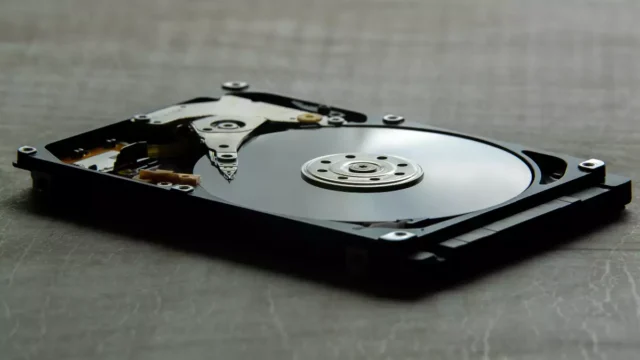
In some cases, physical damage to the storage device that the video is saved on can cause problems with the video as well. This can include scratches on the disk or damage to the disk itself. If you suspect that physical damage is causing the problem, you should try copying the video to a new storage device. If this is not possible, you can try a disk repair tool. These tools can help recover lost or damaged files from the disk, including your damaged video.
Get Professional Help
If you are unable to repair the video yourself, you may need to seek professional help. There are many companies that specialize in video repairs and data recovery. Many of these companies have the tools and expertise to repair damaged videos, and they can often restore the video to its original state. However, be prepared to pay a fee for their services, as this is a specialized and technical process.
Regularly Back Up Your Videos
To avoid having to repair damaged videos in the future, it is important to regularly back up your videos. This can be done by copying the videos to an external hard drive or even on a cloud storage service. Having multiple copies of your videos will help ensure that you have a backup in case one of your videos becomes damaged. Regular backups can also help protect your videos from other types of data loss, such as hardware failure or malware attacks.
Take Care of Your Storage Devices
Lastly, it is important to take care of your storage devices to help prevent damage to your videos. This means avoiding extreme temperatures, protecting the devices from physical damage, and making sure that they are regularly cleaned. By taking good care of your storage devices, you can help ensure that your videos will remain safe and protected for years to come.


