

Spring is here! As Chicago awakens from its winter hibernation, it’s the ideal moment to start a project that will revitalize your home: a complete Chicago Spring Cleaning of your kitchen!
A tidy and organized kitchen isn’t simply visually appealing. It also provides a more functional and comfortable environment for cooking, socializing, and sharing meals with loved ones. Let’s go over a full approach, along with a spring cleaning checklist, for transforming your kitchen into a shining refuge.
Stick to the end of the blog to learn more about Fresh Tech Maid: one of the best spring cleaning in Chicago and read instructions on how to prepare your kitchen for the new season.
Getting Started: Prepare to Conquer the Kitchen

A little planning ahead goes a long way before you start cleaning. Make sure your countertops are clear first. To ensure a clear workplace, remove any appliances, utensils, and ornamental items. Using a moist towel, clean any little equipment you come across during the process.
Next, gather your cleaning supplies. Ensure you have enough garbage bags, sponges, microfiber towels, and all-purpose or sanitizer wipes close by. Things run all the more effectively, and you can remain on track when you have the right tools close by.
In the event that you have little kids or pets, use natural cleaning agents like vinegar and baking soda for a safer approach. Lastly, ventilation from open windows improves the flow of fresh air and reduces contact with irritating cleaning fumes.
Spring Cleaning Checklist: Deep Cleaning Your
Kitchen
Now that you’re prepped and ready, let’s conquer the different zones of your kitchen!
The Appliance Zone:
Now that you’re prepped and ready, let’s conquer the different zones of your kitchen!
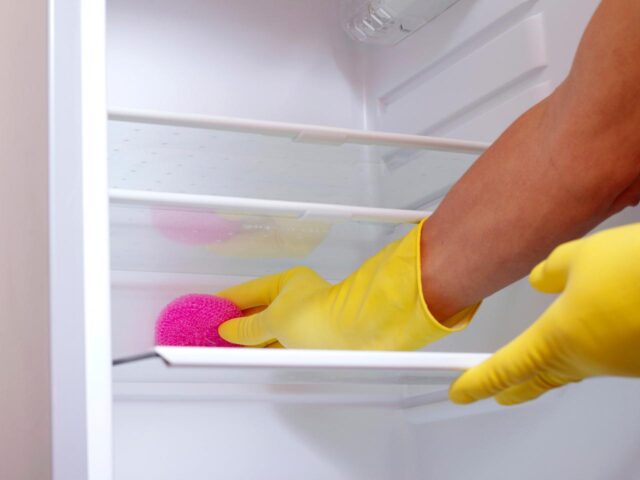
- The Refrigerator: Take out all the food items first. Take out any food that hasgone bad or expired, and then comb through condiments and leftovers to save just the best.
Use warm, soapy water to clean shelves, drawers, and door compartments, or use disinfectant wipes. Lastly, give the outside door and knobs a quick wipe-down to make your refrigerator seem like new. If the the external surface is stainless steel, clean along the grain.
- Oven: Baked Grease and dirt can collect in ovens. See the guidebook that came with your oven for more thorough cleaning instructions. Use the self clean function. Self-cleaning is always preferred and open all windows during the self-cleaning process.
Alternatively, you can follow this quick brief: After removing the oven racks, immerse them in hot, soapy water. Use a paste of baking soda and water to clean the interior of the oven.
- The Microwave: Microwaves can serve as breeding sites for smeared food.
Here is a simple trick: Warm a bowl of water with lemon or vinegar slices for a
a few minutes. Steam can remove filth, making it simpler to clean the inside
surfaces with a moist cloth. Remember to clean the outer door and handle as well.
The Food Storage Zone:
- The Pantry: Clear out your pantry by removing all food products. Check the
expiration dates for canned products, condiments, and dry ingredients.
Discard everything that is out of date or past its prime. This is also an excellent
opportunity to clean off the pantry shelves and door with a wet cloth for a a fresh start.
- The Cabinets: Like your pantry, totally clear your cabinets. Use this chance to
clean shelves, cabinet doors, and the backs of cabinet doors. Consider coating shelves with shelf liners to keep spills from becoming sticky messes.
The Sink and Prep Zone:
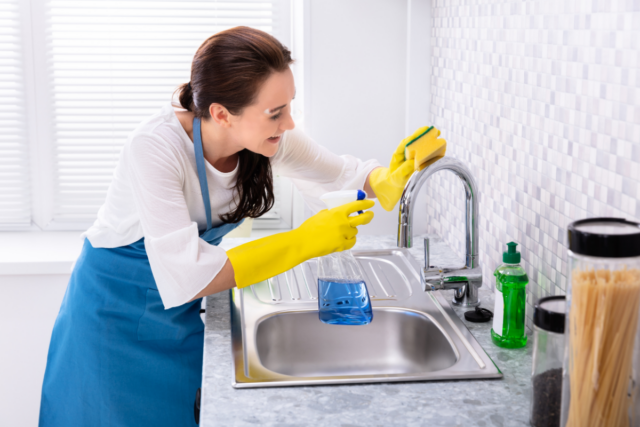
- The Sink: Your kitchen sink is a high-traffic area that should be thoroughly
cleaned. Disinfect the sink using the proper cleanser, giving special attention
to the faucet handles and drain area. To prevent bad odors, clean and sterilize the drain stopper.
- Countertops: Use warm, soapy water and give them a thorough wash.
Remember to disinfect areas like the sink and faucet handles that are
regularly touched.
Finishing Touches
The last set of spring cleaning tips for your spring cleaning project is adding the final details that improve your kitchen’s overall look and feel.
- Sweep and Mop: Sweep or vacuum your kitchen floor to remove any residue, crumbs, or trash. Follow up by wiping using a floor cleaner suitable for your deck material (hardwood floor cleaner for wood floors).
- Replace Air Filter: If your range hood vent has air filters, replace it with a new one to further improve ventilation and exhaust out cooking smells all the more Effectively.

Source: apartmenttherapy.com
- Clean the Trash Can: Clean inside and out. Consider adding a baking soda compartment to absorb odors. A thorough wash can eliminate lingering bacteria and germs, ensuring your kitchen remains hygienic. For a deeper clean, mix a solution of warm water and vinegar, allowing the trash can to soak before rinsing. This not only disinfects but also helps in keeping the can fresh between cleanings.
- Replace Items: Consider adding fresh liners to drawers and shelves. Restock your cleaning supplies. Replacing old liners with new ones can instantly brighten the space and make it feel refreshed. It’s also an excellent opportunity to take inventory of your cleaning supplies, ensuring you’re well-equipped for regular upkeep. Don’t forget to check the expiry dates on products and replace any tools like sponges or brushes that have worn out over time.
- Don’t Forget to Decorate: Add a vase of fresh flowers or a new kitchen mat to celebrate your clean kitchen. Small decorative touches can significantly boost the kitchen’s ambiance, making it more inviting.
Conclusion
Congratulations! You have successfully completed your spring kitchen cleaning! A clean and organized kitchen is not only a pleasure to work in, but it also adds to a less stressful and more joyful culinary experience.
Remember, the key to keeping your kitchen clean is to include easy cleaning routines in your everyday life. Wash dishes right away, clean up accidents as soon as they happen, and tidy surfaces on a regular basis. With a little work, you can keep your kitchen functional and lovely throughout the year.


