

A closure wig is great for those who want to quickly change their look without the hassle of styling their hair. They come in various styles and textures, so you can tailor the perfect style that best suits your face shape and hair type.
The best part about closure wigs is that they are easy to install and relatively hassle-free. However, when it comes down to doing it, many people need to be aware of the steps involved or feel intimidated.
This guide will provide a step-by-step tutorial on how to install a closure wig for beginners easily and quickly and discuss some points you might want to be clear about a closure wig. After going through these instructions, you will have your closure wig ready to go in no time!
Closure Wig for Beginners

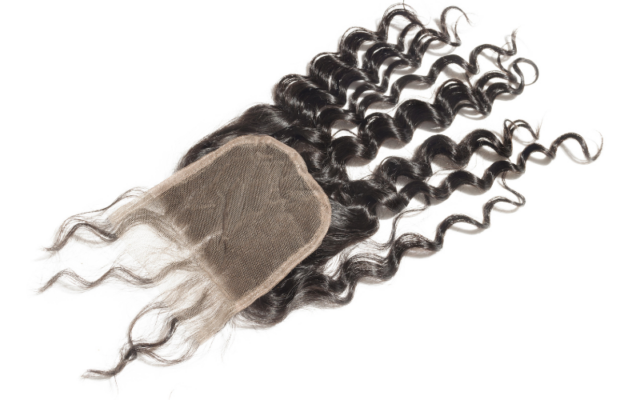
It’s crucial to understand that closure wigs are designed to completely cover your scalp without making any adjustments or adding extra pieces. This means you won’t need to worry about blending your natural hair with the wig since it already covers the entire scalp.
A closure wig is one of the most popular options because it can be easily installed in a variety of ways. The two main methods are gluing and sewing.
Installing A Closure Wig With Glue
Using glue to install your closure wig is one of the quickest and easiest methods, but it should only be used if you’re comfortable doing so.
First, you’ll need to prepare your natural hair by brushing it down flat and trimming away any excess. This will make sure that the wig cap can fit snugly on your scalp. Next, apply a thin layer of adhesive glue on the perimeter and sides of the wig cap.
Finally, place the closure wig on top of your head and press down firmly to ensure it’s securely in place.
Installing A Closure Wig With Sewing
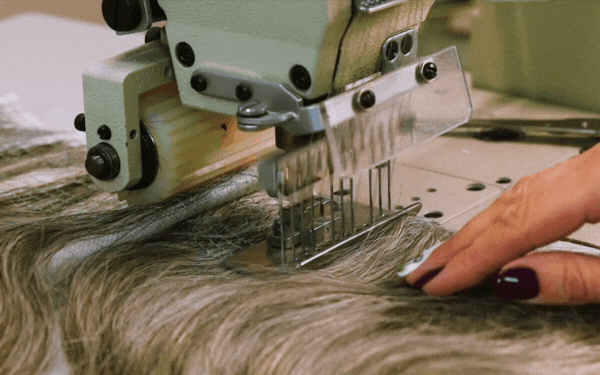
If you’re not fond of using glue, then you can also opt for the sewing method to install your closure wig. This is a bit more time-consuming but is still relatively easy to do.
First, you’ll need to measure and mark the perimeter of your head on the closure wig. Then, use a needle and thread to sew the perimeter in place.
Finally, sew around the cap’s edges to ensure that your closure wig is securely in place.
Guide to Install A Closure Wig
Hair Preparation
Before starting, we recommend doing complete preparation on your hair.
- Start by washing and conditioning your hair. This will give you a clean base and ensure the wig stays secure.
- Then, comb out any knots or tangles in your hair to make sure it’s smooth before installing the closure wig. Once this is done, you can start with the installation process.
Installing The Closure Wig

Step 1: Place the wig on your head.
Start by positioning the lace closure at the front of your head. You can adjust its position as needed to get a perfect fit.
Step 2: Secure the closure with clips.
Secure each side of the closure wig with a clip or two to ensure it stays in place while you adjust everything else.
Step 3: Put on the wig cap.
Put on a wig cap over your natural hair and ensure it covers all of your hair. This will help keep your natural hair in place and prevent irritation from the lace closure.
Step 4: Sew in or glue down the closure wig.
Once everything is in place, you can sew in or glue down the closure wig. With good-quality wig glue, your closure will stay put for several days before needing to be touched up. If you want a more secure fit, we recommend sewing it in for maximum stability and longevity.
Step 5 – Styling the wig
Once all the steps are completed, you can start styling your closure wig however you like! You can use heat tools and other accessories to get the perfect look that best suits your face.
How Long Does It Take to Install A Closure Wig?
Taking time with the process is essential so everything is done correctly and looks flawless. On average, installing a closure wig should take about 30 minutes. This may vary depending on the size of your head and the amount of time you spend customizing it.
Installing a closure wig yourself can be challenging, but it’s very doable. Just take your time and follow the earlier steps for the best results. Be sure to practice ahead and be careful with each step of the way so that you don’t damage the lace closure or natural hair underneath.
Are Closure Wigs Better for Beginners?
Closure wigs are perfect for beginners since they don’t require any additional work or adjustments. They provide complete coverage of the scalp and look natural when installed correctly.
Furthermore, they can be styled easily with any styling tool, making them an excellent option for getting started with wigs.
Overall, closure wigs are an excellent choice for beginners who are looking to switch up their hairstyle without any stress. With this beginner-friendly guide, installing a closure wig should be easy and quick!
Remedies to Try If Your Closure Wig Isn’t Looking Right

If you feel that your closure wig isn’t looking right after installation, there are some remedies you can try to fix the problem.
- First, check the wig cap to ensure it’s properly secured over your natural hair. If it needs to be more secure, the closure wig may not stay in place.
- Next, try adjusting the clips or glue around the closure to ensure it’s firmly secured. If needed, you can also lightly brush the lace to blend it with your forehead and help create a more natural look.
- Lastly, try using a stronger wig glue or add more clips to ensure the closure wig won’t move.
With these tips in mind, your closure wig should look flawless once finished!
Confidence is Key!
Installing a closure wig is easy to switch up your hairstyle without any hassle. With this beginner-friendly guide, you can install one quickly and, most importantly, confidently.
Be sure to take your time and follow the steps outlined above, as well as adjust the clips or glue around the closure if needed. With some prior practice, you should be able to get a flawless look in no time!
With this guide, anyone can install their closure wig quickly and confidently. You can now create your own unique look at home, whether a beginner or an expert. So what are you waiting for? Get started with this guide and start creating your perfect hairstyle today.


